Prime Time BBS

Note: Throughout this post, I’ll use “us”, “I”, “me”, and “we” fluidly, since I did most of these things with my friend, and I just can’t decide whether each thing was done by me alone, or together with my friend.

When I was in grade 8, I started a bulletin board (BBS) on my family computer, using a 2nd phone line that I convinced my parents to get for us. It started out as a text-based system using free software that I downloaded from another BBS, but I soon migrated to graphical systems.

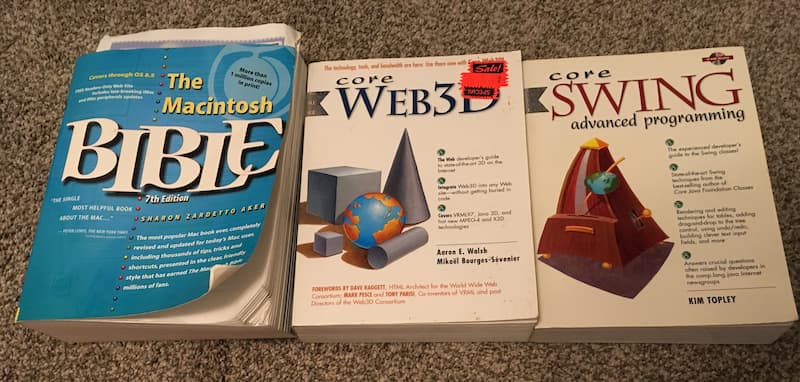
I used a pirated version of First Class Server for experimentation. First Class was the gold standard for Mac BBS software, but it was quite expensive. I recall that it was like $300 for a hobby license, which had a limit of 100 user accounts, and you couldn’t use it for commercial purposes. I might be misremembering the exact price and limitations, but for a kid with no job it was champagne, and I wasn’t even old enough to have a beer budget yet.

The thing that set First Class apart from all the competition was its graphical user interface. You see, most BBSes at the time were text-based, meaning that it was kind of like using your terminal program. No mouse, or windows. The menus would just be numbered lists of options, and you would have to type in the option that you wanted to choose. I happily tolerated these archaic text-based interfaces until I discovered First Class.

First Class provided, pardon the pun, a “first class” experience. When you logged into a First Class BBS, it felt like you were just accessing a multi-user part of your computer. The main menu was just like a regular Finder window but with some custom icons and backgrounds in the window. It supported email, message forums, file attachments, multi-user chat-rooms, and background, resumable file downloads. The experience was pretty darn close to modern systems like Slack and Discord – but back in 1993, it was ground-breaking.

For me, there was no going back to text-based bulletin boards, once I knew that GUI BBSes existed.

The only problem was cost. First Class was out of my price range, and using pirated software for a public BBS just wasn’t an option – it was too easy to get caught. And it was always my intention to grow it into something big, like AOL or Compuserve, so everything had to be legitimate and above board.

Luckily, in chatting with the sysop of The Revelation, the best First Class BBS in the Vancouver area at the time, I discovered that they had a license for NovaLink Pro, a competing BBS system that also had a graphical user interface. And he was willing to sell it to me for an affordable price. It was around $100. I think it had a limit of around 100 users, but there was no commercial restriction.

I had never heard of NovaLink Pro before, but it sounded perfect. There weren’t any NovaLink Pro BBSes in my area, so it was difficult to make a comparison, but they had a demo version that I downloaded and installed. It wasn’t as polished as First Class. Some aspects of the UI were similar. E.g. The main menu looked like a finder window with icons for all of the menu items. However, in First Class, you could customize the look of the items – change the icons, drag them into different positions, etc. On NovaLink, the icons were arranged in a grid, and sorted alphabetically, and you couldn’t change the config. You could click on an icon to select it, or double click it to open it, but you couldn’t drag it around.

NovaLink did have some cool features that First Class was lacking, such as Telnet support (i.e. the ability to log into the BBS over the internet – which was a very new thing), but overall, the impression I got was that it was a poor-man’s First Class.

As a fourteen-year-old kid, I was nothing if not a “poor man”, so I felt that NLP (NovaLink Pro) was a perfect fit. There’s also some part of me that likes to support the “B” team. I was a Macintosh user in a world of 99% PC, and despite owning a Nintendo Entertainment System, I was very curious about competitors like the Sega Master System – and later on, about the “also-rans” in the 16-bit console wars, like TurboGraphix16. My search for movies similar to Indiana Jones led me to a few duds (King Solomon’s Mines, Alan Quaterman and the Lost City of Gold), but also to a few that were better than okay (Romancing the Stone).

So, in the world of GUI BBSes, where First Class was the clear leader, I liked the idea of going with NLP – the underdog.

Before finalizing the purchase, I contacted ResNova, the company that made NLP to make sure that it was “legal” for them to sell me the license. They said it was, but recommended that I buy the manual from them – and we would be entitled to upgrade to their new version, “4.0”, when it came out.

I bought the software from the Revelation BBS, but I don’t recall ever receiving any packaging from them. It must have been the sort of thing where they called ResNova to transfer the license. I do recall having an option of how I wanted to get the software. I could either wait for it to come by mail (actually that part was going to happen anyways, because we bought the manual – and the software came on floppy disks inside the manual), or I could download it from Nova Central, ResNova’s BBS, and pay the long distance fee. Yes, in those days, before the internet, you actually needed to dial into BBSes over the phone, and if the BBS was in a different area (ResNova was located in California), then you had to pay long distance fees by the minute, which could grow to be substantial.

I figured, how long could it possibly take to download the software? I was also pretty hyped about logging into a real BBS that used NovaLink Pro, so I chose to try to download it.

As it turned out, it can take a very long time to download software. The application fit onto three 1.44MB floppy disks, so it was probably about 4 megabytes. My modem was 14.4kbps, so under optimum conditions, it should take about 100 seconds per disk, so I should have been looking at five minutes or so. I don’t remember the long distance prices, but let’s say they were ten cents per minute (I think that is realistic for the time), then I’d be looking at fifty cents. Well within my budget. But there was still the matter of logging in, and filling in the sign-up form. So we’re looking at about ten minutes or so. I could splurge for a dollar. Heck, make it twenty minutes – I’ve got plenty of change where that came from.

Unfortunately, their download protocol, a custom protocol that they named RNP (for ResNova Protocol) was a little flakey. I started downloading the disk images for the software, and then proceeded to browse around the BBS to see what else they had to offer. Unfortunately, the download stalled at around 5%. I gave it a few minutes to see if it would “un-stall” itself, and after it didn’t show any more progress, I canceled the download and started again. The same thing happened again. So I put it on for a third time, but this time I decided to just let it download undisturbed and not browse around the site. Their download protocol, a custom protocol that they called RNP (ResNova Protocol) was supposed to support background downloading, but it was a little flakey.

I don’t think that three times was a charm, because I remember the call lasting nearly three hours. Ultimately, though, I did manage to download the software. I didn’t mention anything about the long distance to my parents, and they never brought it up, so I’m guessing it wasn’t so high as to stick out like a sore thumb.

Two weeks later, I received a parcel in the mail with a hard copy of the manual, printed and bound in a three-ring binder, and “official” install disks. There were four disks in total, the fourth one containing only my license key.

novalink-manual-cover

Setting up the BBS

I installed the BBS on the family’s Macintosh Centris 660AV computer, and just kept it running in the background all day. As I write this, I begin to question how well this would have worked on the Macintoshes of the day – I think it was around System 8, which didn’t have preemptive multitasking. But as far as I recall, it worked just fine, and my family didn’t even know it was running in the background.

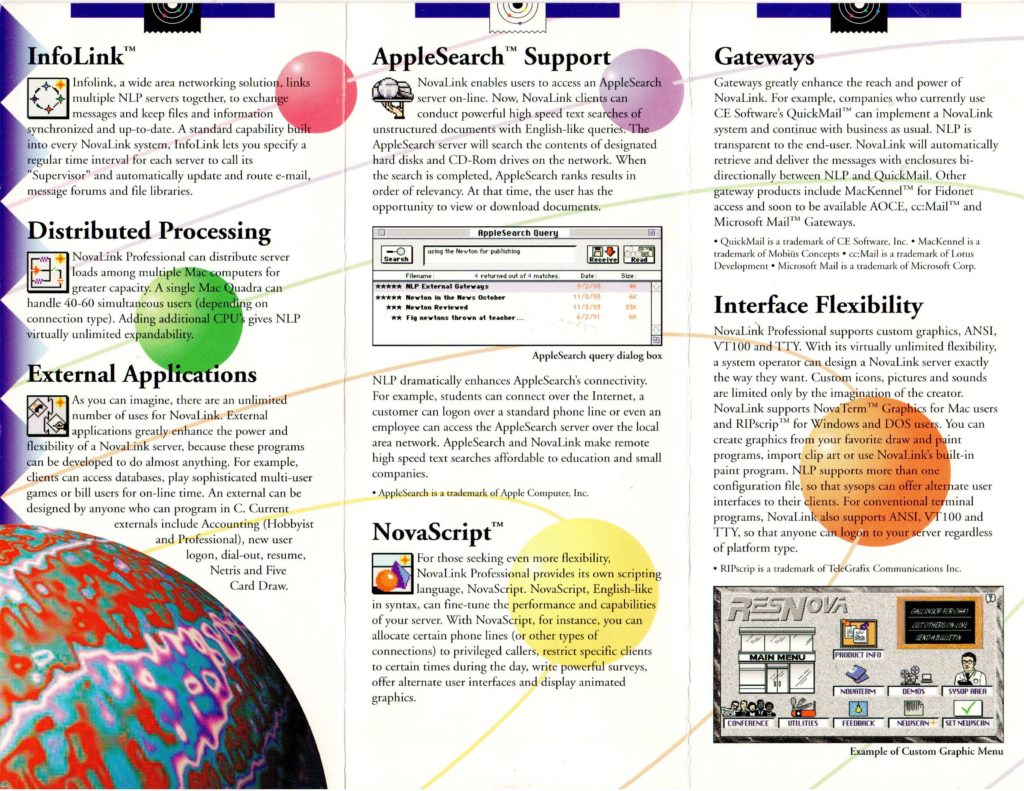
I had a lot of fun poring over the manual to learn about all of the features. NovaLink Pro was a hybrid Text/GUI system that clearly used to be text-only, and added a graphical UI later on, evidenced by the fact that many of the features, such as scripting, were text-only, and had no impact on the GUI.

One of their big selling features, which supposedly set them apart from First Class, was that they supported Telnet out of the box – i.e. users could connect to the BBS over the internet, potentially opening it up to a global audience. Unfortunately, this was one of those “text-only” features. Yes, they could log in over the internet, but they could only use the text interface. That wasn’t of much interest to me.

My plan for the BBS was mostly to provide message forums and file download areas, but I also wanted to create a visually appealing experience, using The Transformers (the toy) as a theme. Most First Class BBSes provided a “modded” version of the client with some custom icons and background images, which gave each BBS a distinctive look and feel. These mods were easy to make using Apple’s free ResEdit tool. I created one of my own when I was experimenting with First Class, prior to purchasing the license for NLP.

I was a little disappointed when NLP didn’t seem to allow the same kind of customization. The administration app included a menu editor tool that allowed me to drag items, such as file libraries, message forums, and chat rooms from a palette into the menu, but it didn’t provide any layout options, nor did it allow me to customize the icons. It always laid out the icons in a grid, in alphabetical order.

They did provide an option to use a custom graphic with hot-spots for menu items which was quite cool, but it was an all-or-nothing proposition, at least on a per menu basis. I.e. For a given menu, you could either use a custom graphic, or you could use an automatic menu, but you couldn’t, for example, use a custom graphic in the background, and use the auto-layout icons in the foreground.

It took a while to get used to this limitation, and, in some ways, this was better than the First Class method of modding the client with ResEdit. For example, users didn’t have to download a custom client to be able to see my board’s custom graphics. The vanilla client supported it out of the box. If I added a menu with custom graphics, it would be instantly available to all clients. It was common practice, by contrast, for First Class BBSes to periodically update their clients with new graphics from time to time, and advise users to download their latest version. The NLP solution for custom graphics was much closer to the way that that web would later work.

And, hey, it was actually kind of fun to make menus in photoshop.

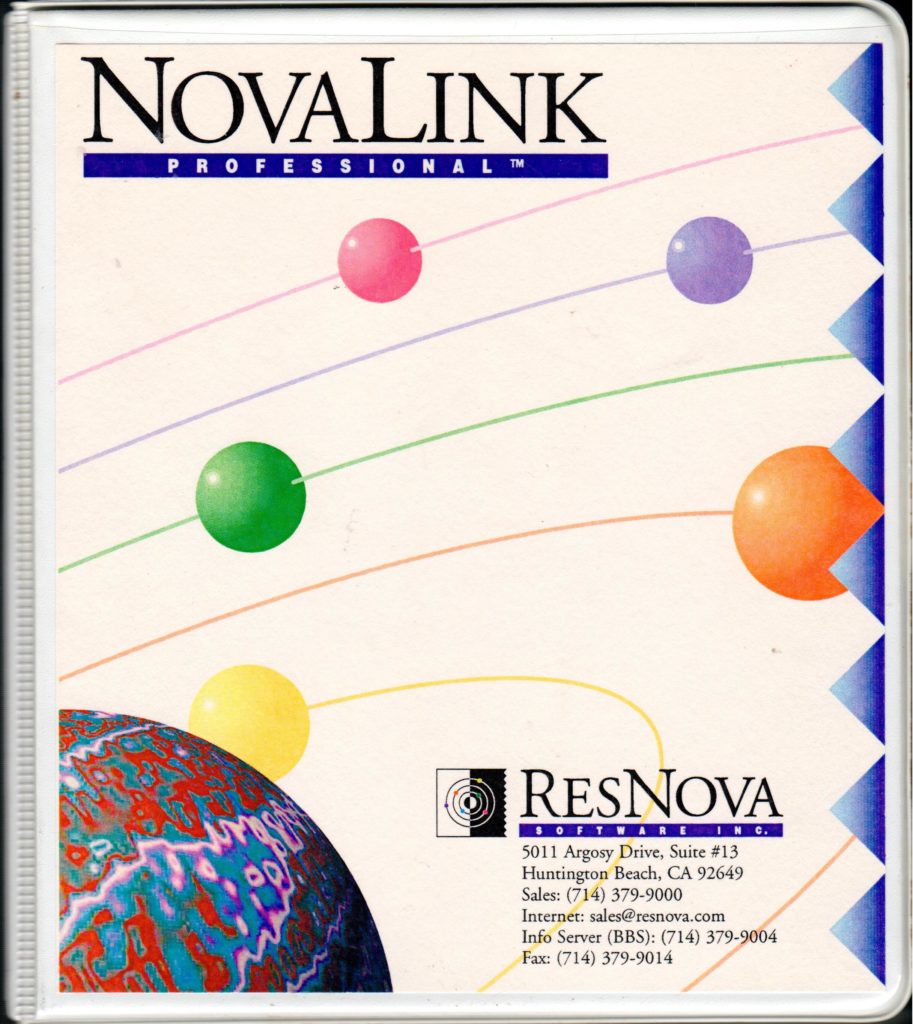
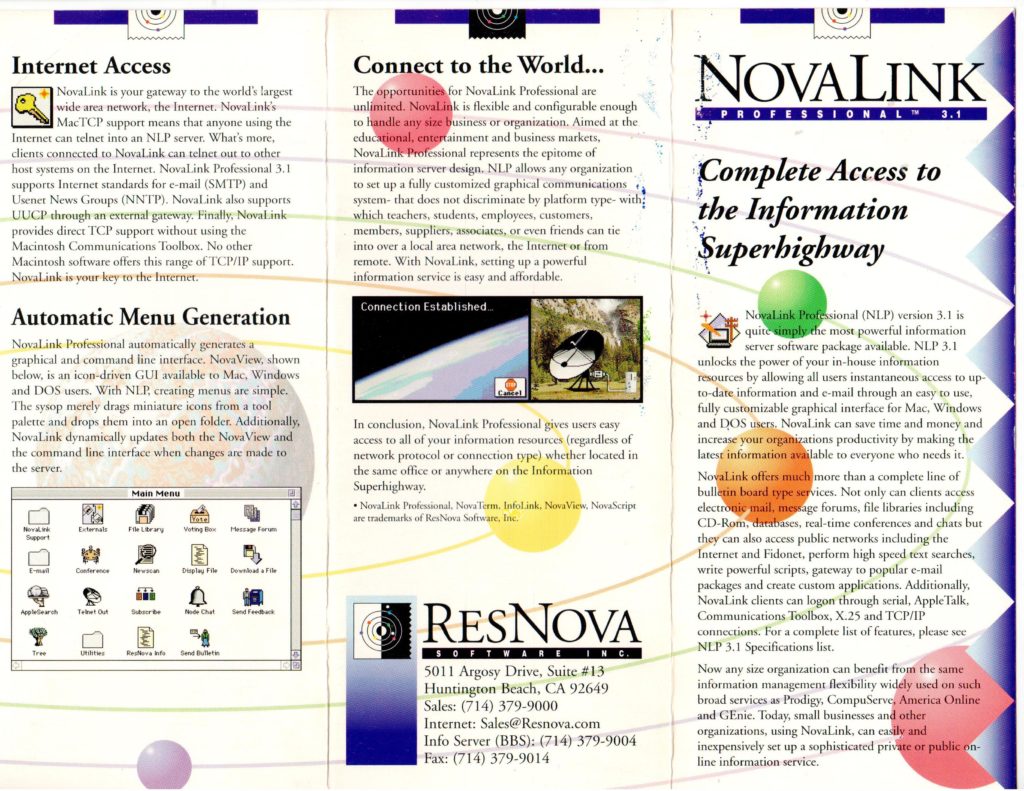
Reading the Brochures I’ve always been a sucker for reading brochures. As a child, I spent hours on my bedroom floor thumbing through the pages of the Sears Wish Book, imagining that I was the little boy depicted playing with the GI Joe aircraft carrier, or riding on that CHiPs-themed Big Wheel. Fast forward ten years, and things hadn’t changed much. Only replace the Sears catalog with ResNova’s brochures for NovaLink Pro.

I don’t recall if the brochures came with the software when I purchased it, or if we received them prior to the purchase, but I do remember spending many hours studying them, and memorizing all of the features listed. Features like Telnet, Usenet, Fidonet, and Apple Search. I only had a dim idea of how the features worked, but where experience and know-how were lacking, my imagination filled in the gaps. I imagined building a service like AOL, where hundreds or thousands of people in the Vancouver area would log in to my BBS to get their news, access the internet, chat with each other, and maybe even buy products.

novalink-brochure-side-a

novalink-brochure-side-b

In fact, I even made my own brochures for this yet-to-be-created online service, which I dubbed “Vancouver Online International” or VOI for short. I guess “Prime Time BBS” just wasn’t grand enough for my vision. I spent hours, days, weeks creating mock-ups for each section of the BBS in Photoshop, making use of all of the modern effects it offered. Lots of emboss, gradients, lens flares, and, my favourite: extrudes. That’s the one where it partitions the image into 3D cubes that are sort of jumping out of the image at you.

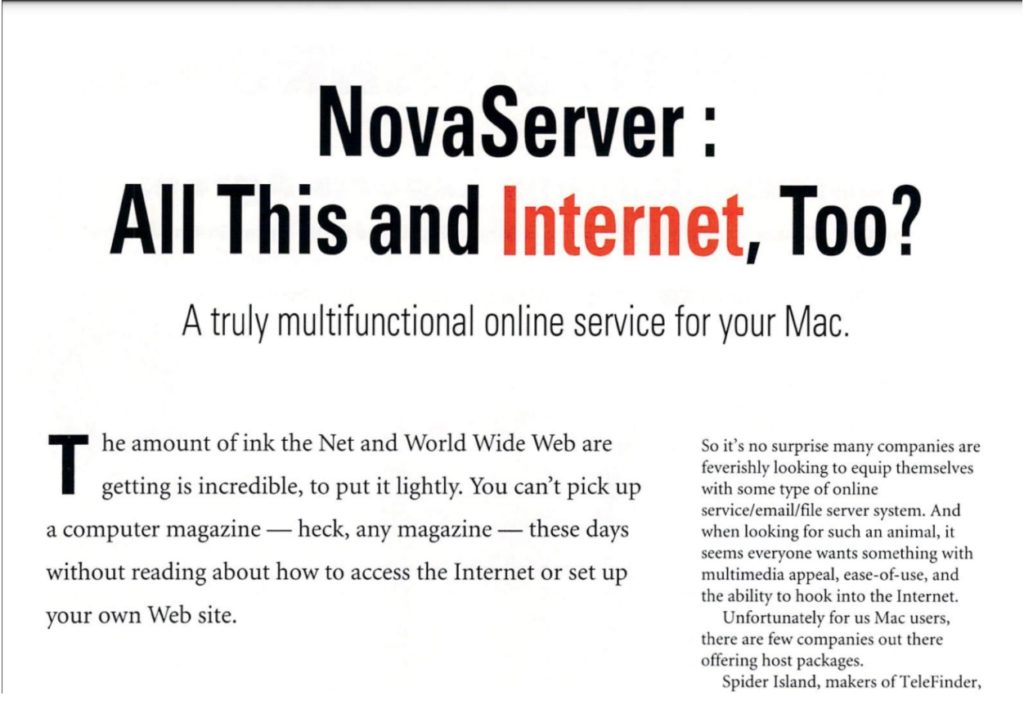
The World Wide Web is Coming

The press releases were almost as exciting as the brochures, despite their lack of graphics. I distinctly remember the one announcing NovaServer 4.0. Yes, they were changing the name of the server from NovaLink Pro to NovaServer for their next major release. The big news, in addition to the name change, was that it would include full support for the World Wide Web.

This was the first time I had ever read (or heard) the term World Wide Web, or WWW, and frankly, it didn’t mean much to me at the time. I recall being a little bit disappointed by the announcement because I was more hoping that they would add FTP support, since this was the key to file downloads. Nonetheless, I was intrigued by this new “Web”, as they called it.

As soon as NovaServer 4 was available, I downloaded the demo, and started playing with it. The WWW support was neat, but clearly nascent. The client came with a reasonably compliant web browser built into it, and it used HTML to encode most of its custom graphics, but the general web browsing experience left a lot to be desired. For one, it didn’t support file downloads at all.

Despite its shortcomings, I recognized the potential.

And Then They Were Gone

Nova Server’s inclusion of a Web Browser inside a Bulletin Board client is, perhaps, the most direct link between the golden age of the BBS and the advent of the internet. No other BBS software, that I’m aware of, incorporated the internet to the same degree as Nova Server did. Unfortunately, it barely got a chance to spread its wings before it was purchased by Microsoft and discontinued.

From Web TidBits, Nov. 1996:

Microsoft Gets Personal — In a surprising move, Microsoft and ResNova announced that Microsoft has acquired ResNova’s Web server products: the personal Web server WebForOne, and the full-featured Boulevard. In conjunction, five of ResNova’s employees, including president Alex Hopmann and product manager Lauren Antonoff, have joined Microsoft’s Internet Platform and Tools division in San Jose, and ResNova is seeking a buyer for its NovaServer bulletin board system.

http://www.resnova.com/

I only discovered this years later. From my perspective, ResNova just sort of disappeared without a trace. Even now, with the benefit of modern search technologies like Google and Bing, it is quite difficult to find corroboration for my memories of its existence. You can find the odd mention of it on old BBS lists that people have posted, and I found one press release on a Usenet archive – though without the ResNova letterhead, it’s not the same. The best proof of life for NovaServer is found in the December 1995 issue of BBS magazine, which archive.org has kindly preserved for humanity. Link here (page 46).

bbs-magazin-dec-1995

More recently I discovered that Apple Fritter, currently uses NovaServer 4 for its eWorld clone.

Reviving Nova Server

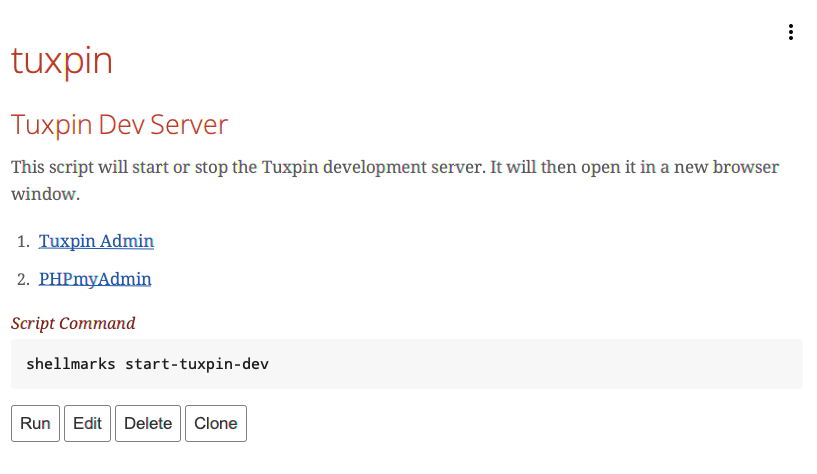
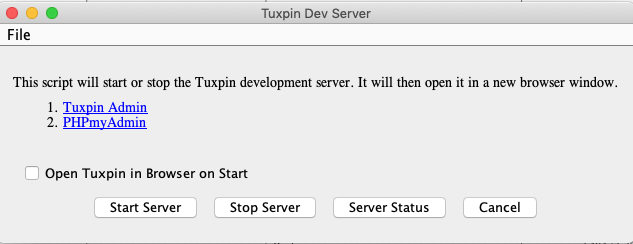
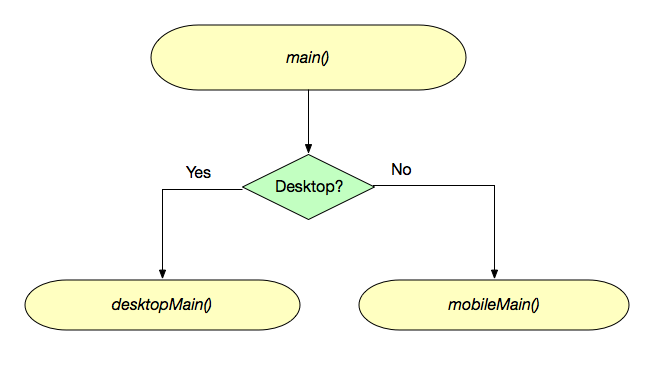
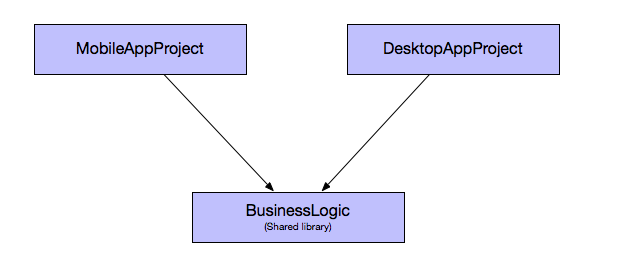
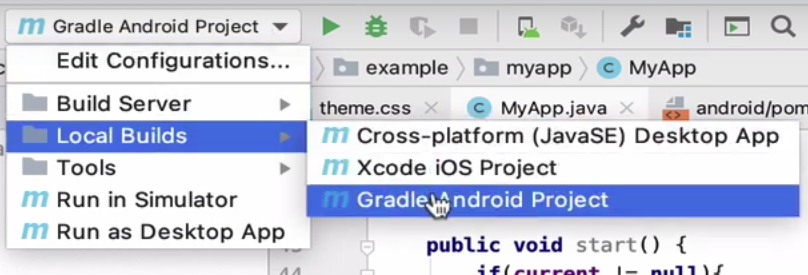
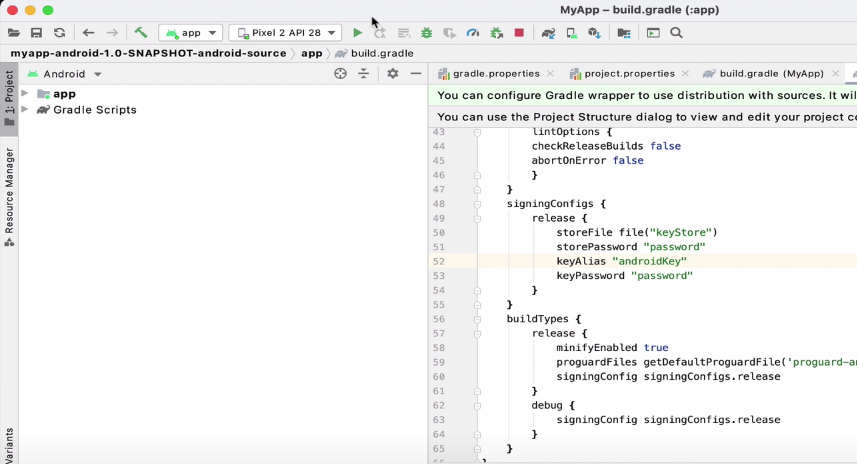
In my spare time, I still sometimes play with Nova Server, and I have dreams of reviving it. A couple of years ago I managed to create mostly-functional web, mobile, and desktop clients. I still have all the old software, and have acquired some documentation for its C API for writing extensions, which should make it possible to write a CGI gateway, which would really open things up. E.g. I could write dynamic extensions using PHP, Python, or any other modern programming language, to augment the features of the old Nova Server.

I don’t know when I’ll have time to do all of this tinkering between the day job and the family, but I choose to believe that someday I’ll have the time, and, God willing, still have the passion to build things like this. In the meantime, I’ll just wax nostalgic about the good ol’ days, when the internet was still mostly just a dream, and we could build it into anything we wanted.

george-bell-sheet-small

How I got hooked on Baseball Cards (part 1)

I started collecting baseball cards in 1988. I know this because I still have the Panini sticker book that started it all off. I don’t remember how I got that sticker book – probably as a birthday present, which would have made it technically the end of 1987, rather than 1988.

panini-1988

The sticker packs were sold at convenience stores and supermarkets, so I would probably get a pack every time I accompanied my mom on the weekly grocery shopping trip. I collected Blue Jays. Actually, I collected whatever came in the pack, but I always hoped for Blue Jays. This is because a few months earlier, I had visited my Grandpa while he was watching a Blue Jays game, and he explained to me that they were the only Canadian team in the league, so we should cheer for them.

Made sense. I was Canadian. The Blue Jays were Canadian. Therefore I must be a Blue Jays fan.

So, being a Blue Jays fan, I naturally hoped for Blue Jays when I got a pack of stickers.

My friend Chris was also Canadian, so he was a Blue Jays fan too. He had the same sticker book, and was also collecting Blue Jays. And, since all kids need to choose a favourite player, mine was George Bell. The choice was based on a mix of statistics (he was American League MVP in 1987), randomness (his sticker was one of my first), and which player’s picture I liked best.

george-bell-panini

Chris’s favourite player was Tony Fernandez.

My Panini sticker Blue Jays collection was almost complete before Baseball cards even entered my consciousness. I knew what they were, but they had never crossed the chasm between things that “exist” and things that were “options”. During those early days of collecting, I had to correct several adults, including my parents, when they said that “I collected baseball cards”. I collected stickers. Not cards.

I didn’t even know what I would do with a baseball card. I mean, at least with a sticker I could stick it in my sticker book. There was an empty, outlined space for it and everything. It was like a puzzle waiting to be completed.

My First Pack of Cards

Then, one fateful day in the Spring of 1988, I got my first pack of baseball cards. I don’t recall the circumstances. It could have been a miscommunication, like I asked my dad to get me a pack of baseball stickers when he went in to pay at the gas station, and he came out with a pack of cards instead. Or it could have been a pragmatic choice, like I was allowed to get a pack of stickers at the store that day, but they didn’t have any, so I got a pack of cards instead.

Whatever the circumstances were, I opened that wax pack of 1987 Topps baseball cards, and found, to my delight, that it also came with a stick of gum. The gum was rock hard, but once you got it going it would still chew, and it still provided some sugary sweetness. Panini stickers didn’t come with gum.

Side note: For some reason Topps gum was always rock hard. O-Pee-Chee gum was typically much softer.

I could get used to this whole “getting gum with my baseball cards” thing.

But it gets better. The pack came with about 14 cards, and one of them was a George Bell “All Star” card. I had struck gold on my very first pack. My favourite team – and my favourite player. I couldn’t believe my luck.

What are Baseball Cards Good For?

Now, I had this stack of cards, but I didn’t know what to do with them. I couldn’t stick them anywhere, and I didn’t yet know about all of the elaborate accessories that were available for the display and storage of baseball cards, so I just stacked them on a shelf in my room.

Shortly after that first pack, I was faced with an honest to God choice between a pack of stickers and a pack of cards at the grocery store, and I … chose the cards. My panini sticker book sadly was never completed, and includes empty spaces for ungotten stickers to this day.

At this point, I began to identify as a “baseball card collector” (as opposed to baseball sticker collector), but I existed in a microcosm. It was just my friend Chris and I collecting cards – and we collected them the same way that we had collected stickers. We’d get a pack of cards at the corner store when we had an opportunity, and we’d hope for Blue Jays. Each trip into a new corner store brought with it the thrill of discovery, as we might discover a new brand of cards.

It was some time before I even knew that there were brands other than Topps – since that is what the corner stores near me carried. Then one day, my friend showed me a pack of O-Pee-Chee’s that he got from a different store. Mind blown. The O-Pee-Chee’s looked identical to Topps. They had the same players, same pictures, same stats on the back. The only difference was the logo in the top corner of the card, which said “O-Pee-Chee” instead of Topps. That and the gum was much softer – but I’m not sure if I knew about that difference yet, since Chris probably had finished the gum long before he showed me the cards.

Side note on the gum: The O-Pee-Chee gum, 35 years later, tends to disintegrate into sugar dust as soon as you start chewing. I know this because I have a case of unopened O-Pee-Chee hockey cards still in a box under my parent’s stairs. I don’t have any surviving Topps package to offer a comparison. Perhaps Topps was playing the long game with their rock-hard gum, and 35 years later it would chew like Bubblicious.

Then one day, on a trip across the border, I found a pack of cards I had never seen before: Donruss. I was slightly disappointed that this pack didn’t come with gum. It came with a puzzle piece instead. Presumably, if I collected several more pieces, they could be assembled into a picture of something baseball-related. I couldn’t wait to show my new Donruss cards to Chris.

The Baseball Card Store

Little did I know that Chris had made a discovery of his own. One that dwarfed my measly Donruss cards.

He had found a baseball card store. A store that had nothing but baseball cards. I couldn’t believe my ears, and frankly my nine-year-old brain was having trouble processing it. I couldn’t quite imagine how you could fill up a store with just baseball cards. Up to that point, I had only seen them at convenience stores, where they would typically have one box with 36 packs of cards sitting amongst the gum and chocolate bars.

“They have boxes and boxes of nothing but cards!” he said. “You don’t even need to buy packs. You can look through the cards and just buy the ones that you want!”

“You can buy any card that you want?!” I asked incredulously.

Seemed too good to be true.

This store was named Chris’s Collectibles, and it was located just across from the library. One evening, while my mom was at the library, I asked if I could go into that store and look around.

If my mind was blown after the O-Pee-Chee discover, then I crapped my pants when I entered this store. (No not really – just trying to express how much of a “good” shock this was).

It was dark outside, so it must have been late. The only people in the store were two adults – one guy with a moustache, T-shirt, and trucker hat who was behind the counter, and the other, a customer, I presumed. They were chatting about baseball stuff – I don’t recall the specifics. My mind was busy processing this amazing new world that I had stepped into.

Before walking through that door, which might as well have been a portal into another dimension, I was aware of only three types of cards: Topps, O-Pee-Chee, and Donruss. And as far as I knew, all three of them had just started making baseball cards in 1988, because that was the only year of cards that were available at the corner stores. (Well, I had knowledge of 1987 Topps because that was the year of my first pack – but I hadn’t seen any more 1987 packs in ages).

Inside that store, they had more, different types of card packs than I had ever seen in my life. They had new brands I had never seen, like Score and Fleer. They had packs dating back five years, at least for most of these brands. They had glass cabinets filled with high-value singles, as they were called – each one in its own hard plastic case, and sporting price tags that were well outside my price range.

The thing that impressed me the most was the line boxes with rows of single cards sorted by year, set, and number. I could literally walk in here and find all of the Blue Jays I didn’t have, and just buy them outright. If I had the money, of course. Which I surely didn’t. I was on a one-pack-at-a-time budget.

So, on my first trip into this new world, that is just what I bought: one pack of cards.

But knowledge of this house of treasures changed my world for years to come. I had graduated beyond corner stores.

One thing lost in this transformation was anticipation of discovery when entering a new convenience store. I now had access to the definitive trove. I knew what brands were “out there”, so the odds of discovering anything new at the corner store was low to nil.

The Joy of Trading

My next big milestone, after the baseball card store, was the discovery of the joy of trading.

At the time I entered the baseball card store for the first time, and during the weeks that followed, I was still collecting in a microcosm. Chris and I would trade our doubles to help each other complete our Blue Jays collections – which was getting more and more difficult with the exponentially expanding universe of different sets – but we weren’t part of any larger “baseball card” community.

I didn’t really have any desire to find a community. I’m an introvert, and I liked collecting cards. If I needed a card, I could continue to buy packs and hope for the best – and the existence of a baseball card store was like a newfound super-power – as I could also go in there and just buy whatever card I needed to further my collection. But one night the community found me, and hooked me.

It was a night-time church meeting. I don’t recall what it was for. I remember that it was for the grown-ups, but a lot of kids would be there too. One of the grown-ups mentioned that his son and a few other kids would be bringing their baseball cards to do some “wheeling and dealing” (that was the first time, not the last time, I had heard that term), and he wondered if I was planning on joining in.

I didn’t really know what to expect, and I was a little bit nervous. At that point I didn’t know these other kids that well, and they were all a year of two older than me. But I said “okay”, and I brought my cards in a little box with me that night.

When I entered the “trading” floor, I was welcomed by the other kids – there were only two or three of them – and they asked if they could see my cards. One of them, Scott, was the most knowledgeable. He seemed to be an encyclopaedia of facts, and he carried with him a Beckett price guide that showed what every card was worth.

Beckett Baseball Card Monthly would be well-known to anyone who was around for the baseball card bubble of the late 80’s and early 90’s, but this little meetup was the first I had ever heard of it. I’m sure I went out and bought one the next day. Scott looked through my cards and showed me which ones were good. My focus had been on Blue Jays only, so I had no idea if I had any “good” cards in the objective sense. Apparently I did have a couple of good ones, and he offered to trade some of his cards with me.

That feeling of having something that someone else wanted – and being able to get something I wanted for it was special. This lies at the heart of the baseball card experience. That night I was introduced to this fun. I had finally learned what it is that you do with baseball cards. You trade them. Another life-changing discovery.

The Next Chapter: Sports Card Shows

This was only the beginning of my journey, into baseball cards. Over the next few years, the sports cards industry would experience a crazy bubble, and I rode that wave for all it was worth. In my next chapter, I’ll talk about my experience buying, selling, and trading cards at sports card shows.

alexander-shatov-niUkImZcSP8-unsplash

Downloading Youtube Videos with Pytube and Shellmarks

Pytube is a great little Python utility for downloading videos from youtube as .mp4 files. It has a command-line interface that makes downloading videos as simple as entering the following command:

$ pytube https://www.youtube.com/watch?v=....

Replace the URL with the Youtube URL of the video you want to download.

To make things even easier, I wrote a shellmarks wrapper script for this that provides an intuitive GUI form.

image3

Simply paste in the URL and press “Download”, and it will download the video to your “Downloads” directory.

Installation

Pytube installation instructions can be found here.

The TLDR of the install instructions, if you have Python 3 already installed, is to open Terminal and enter:

$ pip install pytube

If pip happens to be the python2 version, you can try

$ pip3 install pytube

instead.

The Shellmarks installation instructions can be found here

The TLDR of the install instructions, if you have npm installed, is to open Terminal and enter:

$ sudo npm install -g shellmarks

I have uploaded the shellmarks wrapper script here

To install it in shellmarks begin by opening shellmarks by opening Terminal and running

$ shellmarks

After shellmarks opens, open the menu in the upper right corner and select “Import Script from URL”

image1

You will the be prompted to enter the URL to the script:

image2

The URL to the raw script is https://raw.githubusercontent.com/shannah/shellmarks/master/sample-scripts/pytube.sh

Paste that URL into the field and press “OK”.

This will install the script and refresh the shellmarks catalog. You should now see an entry as follows:

image4

Press “Run” to run the script. You’ll see the dialog prompting you for the video URL you want to download.

image3

Paste any youtube URL in here and press “Download”. You’ll be able to see the progress of the download in the terminal you used to open shellmarks. When the download is complete, it will open the video in your preferred movie player.

NOTE: This script was developed for MacOS, and would need to be modified slightly to work on Linux or Windows.

You can now access this script directly from within Shellmarks anytime. If you want to run it directly from the command-line you could also simply run:

$ shellmarks pytube

References:

Photo by Alexander Shatov on Unsplash

wesley-tingey-snNHKZ-mGfE-unsplash

Automation, Organization, Documentation, and Sanity


I used to be the “Web Coordinator” in a university faculty, and I often had to provide tech support to the office staff. One morning I received an urgent call from one of the program assistants (let’s call her Carol) who had misplaced her notes, which, among other things, told her how to use her computer. I jogged down to her office, and found her with a panicked look on her face.

“What am I going to do, Steve?” she asked. “I’ve lost everything. I need to print out the reports for [something or another] and I don’t remember how to do it”.

Carol was a product of a time before computers, and had adapted to her new overlords with difficulty. She was only a few months away from retirement, but without her notes, it would be a rocky send-off.

“Don’t worry. I’m sure we can figure it out”, I assured her. “Do you remember which program you use to print the reports?”

“No.”, she replied. “I wrote it down in my book. But I can’t find my book”.

You’ll be relieved to know that she eventually found her book, and was able to print her reports. Earlier that morning she had been thumbing through some files in one of those big metal file cabinets, and had forgotten that she placed her book on top of the files. Luckily it was still there the next time she needed a file.

At the time, I recall finding a lot of humour in Carol’s predicament. It was further confirmation that my parents’ generation, of which Carol was a member, were clueless about technology. Imagine needing a book to tell you how to do your job?!

Fast forward twenty years. I now keep an exercise book where I write down notes on …. how to do my job. At the beginning of each day, I write the date at the top of the page, and I write down a short to-do list. I refer back to my previous entries and copy outstanding items into my list for today. In the back of the book I write down things that I will need longer term, like passwords.

If I lost my book, I’d be in a tight spot.

We will all be Carol some day.

My Own Crisis of Complexity

If only I could keep all of my development projects in my book.

I have more development projects on computer than I can easily enumerate. If I had to guess, it would be more than 300, less than 1000. At any given time, I have somewhere between 5 and 10 projects that I’m actively working on, and an another 30 or 40 that I’m regularly maintaining. Projects span many different computer languages, build tools, IDEs, and server types. Each project is associated with its own set of standard and obscure tasks. Despite almost all of these tasks being automated by build scripts and CI, the complexity of maintenance can still be overwhelming. When returning to a project that I haven’t worked on in a while (months/years/decades), it still takes a while to grok the project and figure out how to build it, test it, and deploy it again.

Projects that use Maven or Gradle are generally easier to dust off than, for example ANT, or ad-hoc projects. A working mvn package or gradle build command can help with building up some early momentum, but it is still only the beginning. Sometimes I get the “Build Successful” message, and then think to my self “Oh good, it builds! … um ..Now what?”

“I know I had a development server set up somewhere to run this before. Let’s see if I made a script to start that up.”

“Which server is this deployed to. And what passwords do I need?”

“The certificates are expired… how do I generate those again?”

“Oh.. there are build profiles called ‘production’, ‘release’, ‘live’, ‘beta’, and ‘staging’. Which one is the one.”.

“Ugh…. I hope I left some clues in the README”.

“Damnit! I can’t remember where I saved that project. Was it in ‘Projects’, ‘Xcode Projects’, ‘NetBeans Projects’, ‘tests’, ‘demos’, ‘work’?!!! Maybe I didn’t save it on this computer? Is it on Github? If so, does github have all the latest changes?!”

A Place for Everything and Everything In Its Place

To summarize, my problem is two-fold:

  1. I don’t remember where I saved many of my projects.
  2. I don’t remember how to use (i.e. build/test/deploy) my projects once found

What I really need is a book-like medium that includes a searchable catalog of all of my projects, along with any instructions required to use the project. Bonus if this catalog can include buttons or menus to perform the project’s automated tasks.

Over the weekend, I decided that it was time to solve this problem once and for all, so I built Shellmarks.

Shellmarks provides a live catalog of all of my shell scripts including documentation and GUI launchers, all in one place.

Tuxpin: A Case Study

This morning I added an entry for Tuxpin so that I can easily start and stop the development server, as well as deploy it to production. The Tuxpin server app is a PHP/MySQL application. It is built using Xataface, which provides command-line scripts to start and stop the development Apache and MySQL servers. For deployment, I use a bash script that uses rsync to upload the app to the production server.

Up until now, when I want to work on Tuxpin, I start by opening Terminal, navigating to the tuxpin directory, and running xataface start – which starts up Apache on localhost port 9090 with the app.

When I want to deploy it I run bash deploy.sh.

Frankly, this isn’t too bad. However, I can imagine a slightly older version of me returning to this project after many months, or even years, and not remembering what to do. For the benefit of this future self, I have just created a Tuxpin management script in Shellmarks. When he wants to work on Tuxpin, all he needs to remember to do is open Shellmarks. He can then do a simple “Find” for “Tuxpin”, or he can find it in the table of contents:

shellmarks-toc

The Tuxpin section, in shellmarks includes some very short documentation, links to the development server and PHPMyAdmin pages (that will open in the default web browser if the development server is running), and a button to manage the development server:

tuxpin-shellmarks-section

Pressing the “Run” button brings up a server management dialog with buttons to Start and Stop the server, and another button to show the server status:

tuxpin-shellmarks-dialog

This makes it dead simple to start working with the project. My future self won’t need to remember anything. He can figure it all out from the GUI.

The Script

The script is pretty simple.

Let me describe what’s going on here. The script has two parts:

  1. The first part is a regular bash script that does the starting/stopping/status checking according to the values/presence of certain environment variables.
  2. The second part (after the exit 0 line) is the dialog definition that shellmarks uses to build the dialog.

The documentation shown in shellmarks is set in the __description__ property. Its content is parsed as Asciidoc, so it can include links, headings, etc…

The buttons are defined by sections, whose names correspond with environment variables used by the script.

For example, the following definition results in a “Start Server” button being displayed in the dialog:

[startServer]
   type="button"
   label="Start Server"
   help="Start tuxpin server"
   disposeOnSubmit=false

If the user presses this button it will set the $startServer environment variable to “1” when it runs the script, so that the section

if [ ! -z "$startServer" ]; then
...
fi

is run.

To the future and beyond

I’ve ported one project into Shellmarks. There are hundreds more to do. But all in due time.

If you want to start organizing your life, you can install Shellmarks too.

Learn more in the Github Repo

Photo by Wesley Tingey on Unsplash

splash-image-books

Do Kids Still Read Computer Books?

I still remember my first computer programming book. It was a glossy, black, brick of a book on PERL 5. I had started building web pages a few months prior, using the copy of Adobe PageMill that came with my bondi-blue iMac. It didn’t take long before I outgrew the “what you see is sort of what you get” interface of PageMill and started coding the HTML by hand. And it wasn’t long after that, that I entered the world of “copy-and-pasting Javascript” to gain a level of interactivity in my pages – or at least some scrolling status bar text. I started with a free Tripod account, but soon upgraded to “paid” so I could be rid of that pesky banner ad in the header.

In those early days, I learned mostly by viewing the page source of other webpages, and tried to make sense of the HTML code. One of my first projects was a “Search Remote” – basically a popup search window where people could select from a list of popular (and unpopular) search engines, and enter a query. We provided links that Netscape and Internet Explorer users could drag up to their bookmarks bar to make it easy to open the remote. At the time, there were a few search engines, notably GoTo.com, that would pay you a penny or two for each search query, so I would place these engines first in the list, and wait to get rich. I didn’t get rich, but I did learn a lot about HTML, Javascript, and search engines, and I pushed up against their limitations pretty quickly.

Below is a screenshot of the search remote installation page that I pulled from a Wayback machine capture from 2001. It’s missing some images, but you can get the idea.

Screenshot pulled from the Wayback machine showing the install page for the Search Remote.  Capture was from 1999.  It's missing a few of the images.
Screenshot pulled from the Wayback machine showing the install page for the Search Remote. Capture was from 1999. It’s missing a few of the images.

Back then, all of the search engines were pretty bad, so it was common practice to do a sort of “pub crawl” through all the main ones until you found what you were looking for. You’d start with Altavista (the search engine with the largest index), then you’d try Excite and Yahoo. If you still didn’t find what you were looking for you might try Lycos, Infoseek, or even AskJeeves. This is where my Search Remote comes in. Rather than have to navigate to 6 different search engines’ websites, you could perform all the searches from one place. It worked pretty well, but It still required the user to perform separate queries for each search engine. I wondered if there was a way to let the user perform a single query and have all of the results from the different engines combined into a single result set.

Meta-Search Engines

Sometimes, when you’re stuck on a problem, the watershed moment is simply learning the correct terminology for what you want to accomplish. In my case, as I soon learned, the name for what I wanted to build was a “meta search engine”, and I was not the first person to conceive of such a thing. Meta-search engines would allow a user to submit a single search query to a server-side CGI script, which would relay the query to 5 or 6 major search engines, in the background, and return all of the results back to the user. Some of them would merge the results into a single set, and sort them according to its own relevancy algorithm. Others would keep the results separate, presenting them on a webpage organized by search engine. Dogpile, my favourite meta-search engine at the time, would use the first method: merge the results into a single list, so it felt like a first-class search. (Side note: Just did a search and it looks like Dogpile still exists).

Dogpile meta search as it appears in the wayback machine from Sept. 2, 1999
Dogpile meta search as it appears in the wayback machine from Sept. 2, 1999)

See Dogpile on Wayback Machine

Without a server-side script, it is really hard to write a meta-search engine. This was before AJAX, so the only way to load things from the server from Javascript was using submission forms, and frames. We didn’t even have iframes yet. I tried to build one using pure Javascript, but the results left something to be desired. The best I could do was create a window with a separate frame for each search engine. This worked okay when there were only two search engines, but anything more than that and your “productivity” gains get lost in the clutter of tiny frames.

CGI: The Undiscovered Country

I think that most programmers have a certain resistance to learning new technologies, I was no different. I had cultivated familiarity with Javascript and HTML, but server-side programming was a remote country whose border crossings might as well have been guarded by barbed wire and machine guns. Not until I had exhausted all avenues on the Javascript side of that border, did I decide to venture forth into the untamed world of PERL. I started with things that were freely available online, such as the CGI specification, and the odd PERL tutorial. But the online ecosystem for programming tutorials was sparse, and discoverability was poor – nothing like today, where you can type in just about any programming topic you want, and find tutorials, examples, videos, tutorials, open source projects, and memes enough to keep you busy for months.

One day in my travels, I came across a PERL meta-search script that someone had posted on Hotscripts (or some similar free cgi script site). I printed it out with my Epson 740 inkjet printer, and proceeded to study it. At the time, it was a completely foreign language to me. I recall curling up in bed, on the couch, and in the hot-tub for hours at a time with these pages, poring over it line by line, trying to understand what was going on. It was like one of those pictures they used to display in shopping malls, where, at first, it looks like just a mess of textures, but if you stare at it long enough, you start to see a 3-D image emerge. This script, which, at first, was just a sequence of gibberish, would start to reveal its structure to me in fleeting moments of clarity.

The hours I spent studying that script were important to my growth as a programmer. I still didn’t fully understand what everything meant, and I certainly couldn’t have written my own search script yet, but it did provide me with a feel for what PERL looked like and, strangely, what it felt like. I was ready to graduate to the next level: an actual computer programming book.

Did I mention that I was broke at the time. I had started making webpages just at the end of a six month failed entrepreneurial adventure with a friend, and I was down to about twenty dollars in my bank account on a good day. Luckily, I was living at Casa de my parents where rent was reasonable (free), but I didn’t have a lot of money to spend on frivolities. Or essentials. That was OK, because I was going to be getting rich from my search remote any day now.

To the Bookstore

So, when I entered my local Chapters to shop for computer books, I might as well have been shopping for high priced commercial real estate, as both were out of my price range. Computer books went for anywhere from $60 to $120 depending on how “hot” or specialized the topic was. Lack of funds did not deter this dreamer, though. I scanned through the tables of contents of several dozen books, trying to identify the one that spoke most directly to my interests. When I was a child I used to spend hours examining the toys section of the Sears Christmas catalog, imagining what it would be like to have all of these cool toys and sets. This was that, except replace “Masters of the Universe” with “Mastering PERL”.

After what seemed like minutes, but was probably closer to an hour, I had settled on this PERL book. It promised me close to a thousand pages of secrets that, up until now, the universe had greedily kept from me. All I had to do was figure out how to pay for it. A rich benefactor, perhaps?
That rich benefactor ended up being my Dad. I made a deal with him to build a website for his band if he bought the book for me. It was a win win. This book was my first real glimpse into the world of programming. Every page opened my eyes to new possibilities. Things I could build. With every new concept, my mind would start wandering to computer programs I had used in the past, and wondering if I could build something like them – or better.

I could fill a school gymnasium with the spaghetti code that this book (and the hundreds that followed it) inspired. When I later got a job, I started buying a new computer book every payday. Sometimes three or four books. Books on Java, PERL, PHP, HTML, Flash, Servlets, Applets, Game development… you name it. I was hooked. When computer books became more affordable and discount stores like “Half-priced Computer Books” started popping up, I was no longer only buying books on topics that interested me. I began buyings books that I might someday be interested in. I thought I’d won the lottery when, one day, I found a bookstore that was going out of business, and the owner said I could fill 4 big boxes with books for only $100.

Side note: See my post about that time I wanted Star Wars on LaserDisc but ended up with more than I had bargained for. Same personality traits seemed to dominate there as did here.

We are now almost twenty years removed from the computer books hay day. Book stores stock a paltry few books on programming now, and buying books on Amazon isn’t the same. I like to be able to pick up a book, thumb through it, and, um, smell it before I buy it. It’s not a purchase – it’s an experience.
I still frequent the computer books section of Value Village to see if I find anything interesting. Some recent hauls included The Macintosh Bible (7th Edition, 1998), Core Web3D (1999), and Core Swing Advanced Programming (2000). I love reading the preface and introduction sections. They add history and context to these old technologies, and serve as a sort of time capsule that reveals how the world looked to software developers at that time. I love reading 20+ year old predictions about the future, and laughing about how wrong they were, or marvelling at how spot-on they were.

A few of the retro computer books that I picked up recently from Value Village

Old man yells at cloud, reflects on good ol’ days

I wonder, if I were just getting started now, would I still gravitate towards the thousand-page textbook as a preferred method of learning? Or would I just watch a Youtube video. Information is so much more accessible than it was in the nineteen hundreds and there are many new forms of media that are available. There are online communities, question/answer sites, online courses, and video tutorials for just about everything imaginable on Youtube. For free! I suspect that “kids” these days don’t even bother with books. If that’s the case, then oh what a shame. They are missing out on a rich, comprehensive, noise-free medium that gives pure escape from the real world.

I’m not sure how many computer books I currently own. Probably more than 200 and less than a thousand. Most of them are stored away in boxes, spread between my parents’ basement, my garage, my furnace room, and my office, but few coveted titles still enjoy the prestige of sitting on my bookshelf.

My latest project

The Search Remote didn’t exactly strike gold, but I have high hopes for my most recent project, Tuxpin, which builds on my love for audiobooks and podcasts. It is an app (available on both iOS and Android) that allows you to listen to webpages in your podcast app. That project was built using many of the same technologies that I learned how to use at the beginning of my programming journey. PHP, MySQL, and Java. Sadly, it doesn’t contain a single line of PERL.

The website for my latest project, Tuxpin, which allows you to listen to webpages in your podcast app.
]5 The website for my latest project, Tuxpin, which allows you to listen to webpages in your podcast app.

Footnote:

I might have the original files for the search remote still stashed away on some 4 gigabyte hard drive, but it would require a lot of effort to retrieve it. But, in the same spirit that supplanted reference books with Google+Stack Overflow, I decided to do a quick search on the Wayback machine to see if it had any record of my debut web project. To my delight, they had both my “Homepage” project, and the search remote project. They are missing most of the images, but the page structure is there, and the search engine select lists are intact so you can see which search engines we supported. I’m impressed at the comprehensive list that I amassed. I must have had a lot of time on my hands.

Photo by Sharon McCutcheon on Unsplash

clever-visuals-iMwiPZNX3SI-unsplash

Take me there

I love reading, but I don’t have time to “just read” so I tend to consume a lot of written material in “audio” format. This allows me to “read” while I do other things, like walking, driving, cleaning, and cutting the lawn. I “read” a lot of audio books, and follow a short list of podcasts. For the past year or so, I’ve also been experimenting with the latest in neural text-to-speech systems like Amazon Polly for converting blog posts into audio format so that I can listen to them during my walks. The results are surprisingly good. In many cases, I actually prefer the “machine” narration to a human narration. The voice is natural-sounding and consistent.

My favourite type of book (or blog post) is one that tells a true story, especially stories that intersect my personal lived experience. E.g. Stories about the birth of technologies that I use or remember. Insider accounts behind the scenes of movies or TV shows that I have watched. Memoirs of people who experienced certain events that remember living through. The more I “read”, the more specific my “tastes” become. You might say I’ve become more demanding of writers.

One of the most important qualities that I look for in writing is the ability to “take me there”. Books that give a mere account of what happened are barely better than reading a wikipedia article. I want a story to transport me into the time and place in which the described events occurred. I want to feel like a fly on the wall, so that I can imagine what it was like to be living in the story. Memoirs and personal anecdotes have a natural advantage for achieving this level of intimacy because the default is to see the events through the story-teller’s eyes. However, it is still possible to miss the target by focusing too much on sequence of events, and not enough on setting the scene and conveying how it felt to be there.

“The map is not the territory” is a well-known mental model that provides an analogy of what I’m looking for in a story. One way to explain this model is to consider that a map of Paris is not Paris. It is only a map the shows you where things are located from a birds-eye view. It doesn’t provide you with any information about what it feels like to walk the streets of Paris, or experience any of the historical landmarks. When I read a story, I want it to provide me with the territory. I can get the map off of Wikipedia or other reference sources.

My first exposure to this sort of story-telling was Console Wars by Blake J. Harris. It tells the story of the early nineties’ battles between Sega and Nintendo using a technique called as “Scene-based storytelling”. I had never experienced anything quite like it. It felt almost like I was living through a movie, as each bit of history was told through a scene. I don’t know how he was able to put together such a vivid picture the characters and conversations, but however he accomplished it, the end result was magic.

I immediately read his follow-up book History of the Future which uses the same technique to similarly vivid results.

These two books raised the bar for me, and I still have not found anything that quite “takes me there” like they do. I’m always looking, so any recommendations are appreciated.

More recently I’ve started “reading” the Mad Ned Memo, that includes stories from the computer/software industry by a 40-year veteran. His posts are always insightful, and usually combine a theme or timeless truth with some entertaining anecdotes. Not only do his stories “take me there”, they also take me back to my own parallel experiences in my early days of software development. I really wish I could find more content like this.

If you have done any type of software development, or participated in the development of long forgotten projects, I’d love to read about your experiences.

Photo by Clever Visuals on Unsplash

artur-tumasjan-42l3tjsJGyw-unsplash (1)

Star Wars and the Seven Laser Disc Players

Photo by Artur Tumasjan on Unsplash.

This post was inspired by the recent Retroist podcast on LaserDiscs.

A few years ago, I was browsing through the Twitter feed on my phone while waiting for the kettle to boil when I stumbled upon a news story about a community initiative to create a DVD version of the Theatrical Star Wars trilogy. I was momentarily surprised that this was news at all. Surely this has been available for ages now, I thought.

But a little bit of searching reminded me of the conundrum. When George Lucas re-released Star Wars in theatres in 1997, he monkeyed with them. He added scenes and lots of new computer imagery. And he made Greedo shoot first.

Of course, I knew all this, but I assumed that there must be a legit DVD version of the original, unaltered theatrical release available by now.

In fact, there was one version, included on a bonus disc in the limited edition DVD release of episodes IV to VI; but the quality is apparently disappointing because it was sourced from the 1993 LaserDisc release.

Upon reading the word LaserDisc, my mind wandered to the nostalgic realm of yesteryear when my friends and I would frequent the demo rooms at A&B Sound. There we would crank the subwoofer, cue up the T2 LaserDisc, and watch in bliss as Schwarzenegger blazed a trail through the Los Angeles viaduct system on his bad-ass Harley Davidson. LaserDiscs were a high-end luxury item that a kid like me could dream of, but never afford. Even if I could have scrounged up enough to buy a player, I’d quickly go broke from the cost of the discs – I recall that $100 per movie was pretty standard.

As my mind veered back to the present, it skidded over a slick patch, and a terribly wonderful idea was born.

That was like 25 years ago!, I thought to myself. I’ll bet I can pick up a LaserDisc player from Craigslist for almost nothing. And how hard could it be to find a LaserDisc copy of Star Wars?

What if… stay with me here…, I bought a LaserDisc player for the single purpose of playing the original theatrical release of Star Wars? It would be the new jewel of my home theatre – and I would be the envy of the neighbourhood. While all these other suckers were suffering through the lamely modified special editions, or adjusting the tracking on their degraded VHS copy of Star Wars, I would be enjoying the trilogy that started it all on LaserDisc!

The kettle was now boiled, so I poured it into the pot to start the steeping process. Then I resumed my planning for operation LaserDisc.

First stop, Craigslist, where I hoped to find a cheap player. I assumed I’d have to try eBay for the movies themselves. I typed in “LaserDisc” into the search field, pressed the “Search” button. To my amazement, the very first thing that came up was the Star Wars box set on LaserDisc! It was listed as part of a lot of LaserDiscs. Two boxes of them for $50.

The plan was only to get Star Wars. But $50 was well within my cost tolerance for a foolish impulse buy, so if they forced me to take the rest of the discs, then I wasn’t going to complain. I could have that LaserDisc collection that I had always wanted back in ’94.

The tea was finished steeping now, so I poured it into my mug, took a sip, and started plotting my journey to the pawn shop where the discs were being held.

When you are a parent of small children, you can’t just pick up and leave on a whim. You need to negotiate with your wife, first. Depending on the success of the negotiation you may end up with anywhere between zero and three travel companions. Best case scenario, is your wife has your back, and you can just walk out the door and seek your glory. The worst case scenario is that you have some obligation that you forgot about, and you can’t begin the mission at all. The other three possible outcomes are, in decreasing order of goodness are:

  1. You have three travel companions. Two half-lings and a wife.
  2. You have one travel companion.
  3. You have two travel companions.

It is worth noting that option 1, while being preferable to the other two, may involve a more rigorous preparation of rations, and thus it may take longer to get the wagons moving.

On this occasion, it would just be me and my almost-two-year-old apprentice, Apollo.

After finishing my Tea, I packed Apollo into his car seat, and we started off on our fateful journey.

We arrived at our destination about 40 minutes later. It was a small concrete building with barred windows on a fast and wide stretch of King George highway. There were no other cars in the parking lot, but there was a neon “Open” sign in the window, that gave me some assurance that I was in the right place.

Before getting out of the car, I took a quick glance around the neighbourhood, to assess whether there was any way I could pull this off without bringing Apollo in with me. The assortment of Tattoo parlours and questionable-looking passers-by, combined with the mild, but warm temperature forced my hand. Apollo would be joining me.

I unbuckled him, and lifted him out of the seat, then carried him to the door, which was locked. After ringing the door bell, we were buzzed in.

A guy behind the counter asked if he could help me and told him I was there for the Star Wars LaserDisc.

He pulled out two cardboard boxes from the back room and placed them on the counter. I asked if he would be willing to sell just the Star Wars, but he said he couldn’t. I didn’t protest much. I just pulled out my wallet and paid.

The trek back to the car was a multi-trip affair, holding Apollo in one arm and a box of LaserDiscs in the other. The two boxes fit nicely in the back of the car. Sometimes that “hatch-back” comes in handy.

And so the first act of our adventure was complete. We had secured our treasure. Now we just needed to acquire the player.

Sitting in the parking lot of the Pawn shop, I browsed through the Craigslist ads to see if there were any listings on my way home. There was one that was conveniently located in Cloverdale, about half way to home. The ad said he had seven laser disc players, and a whole bunch of movies. All I needed was one player. Perhaps he would be willing to do me a solid and break up the band for me.

“Which one do you want?”, he asked.

“Which one is the best?”, I replied.

“It depends”, he said. “One or two of them may not work – I don’t remember.”

I asked him to send me the model numbers so I could do a little bit of research. He sent me the list and I went to work trying to figure out which one would be best. Unfortunately, LaserDisc largely pre-dates the internet so finding specs on these models was difficult.

After a rather unfruitful ten minute rapid-fire Google session, I decided to just drive there and see what he had.

When we arrived at the guy’s house, he came out and met us.

“Let me show you what I have”, he said.

He opened the door to a storage room adjacent to the house. Inside there were boxes stacked floor to ceiling, and a smattering of electronics.

“Hold on”, he said as he forged a path through the stacks.

I followed him to the back of the room where he had two towers of LaserDisc players. Some of the units looked like they cater more to Karaoke, as they had microphone inputs, volume knobs, and Japanese writing on them. Others were more familiar (Pioneer) and looked like they were more appropriate for movie watching.

“Can you give me any indication of which one is the best one?”, I asked. I knew we had been over this ground earlier by text, but I thought that it was worth a shot to try again, now that we were face to face. Perhaps his body language would provide that extra bit of insight that would help me to decide.

He hummed and hawed a little.

“It’s really hard to say”, he said. “It has been so long since I’ve had them hooked up. I just can’t remember which ones work and which ones don’t”.

“I’ll tell you what”, he said. “Why don’t I just give you the whole lot for, say, $100?”

“Is that just the players, or for all the movies too?”.

I think he had been asking $250 for the lot in the ad – and he mentioned there were hundreds of movies and karaoke discs.

“The movies too”, he replied.

I thought about it for a moment. My gut said, hell yes! I want it all!. But my sober, responsible, self-aware inner adult wondered if this was, for lack of a better word, hoarding. I thought about the original, minimal vision that I had constructed for this project only 3 hours earlier, waiting for my tea to steep. “One LaserDisc player, and one box set… That’s it. That’s all I need”, I had told myself.

“Sounds good! I’ll take it all”. My hoarding inner child won the argument decisively.

Apollo sat patiently in his rear-facing car seat as cardboard boxes began to grow around him. Unfortunately the car reached maximum capacity prematurely, so we had to unload some of it and strategize ways to pack it in more efficiently. LaserDiscs abhor a vacuum, and we did their bidding by filling every possible space in that car. You’d be lucky to fit a baseball card in that car by the time were were done.

You’ll be relieved to know that I didn’t pile anything on top of Apollo. Beside, behind, underneath, but not on top. Though it did cross my mind.

“Don’t look at me, I’m hideous!”

That’s the first thing I said to my wife when I arrived home with a weighed-down car, bursting at the seams with obsolete analog media.

I had returned from the sanctum sanctorum with the ultimate boon: LaserDiscs with the original theatrical release of Star Wars, and a laser disc player.. And a few hundred other discs, and six more players.

Surely one of them must work, right? Right??

Stay tuned for the next instalment, where I test each player, disqualifying the ones that emitted bad smells and demonic sounds to settle on the one that almost worked perfectly. Then got it repaired for twice the cost of the entire rest of this adventure. And then bought two copies of Rocky III on eBay.

IMG_9578 (1)

Photo of me, by my wife.

Maven2iOS

Video: Building a Codename One Project for iOS

This is the third video in my series about our new online tool, Codename One initializr, which allows you to generate a Maven starter project for a native mobile app in one click. The first video showed how to generate the starter project, and run it in the Codename One simulator. The second video showed how to build and deploy the project on an Android device. In this video I show how to build and deploy the project on an iOS device.

TLDW (Too Long Didn’t Watch):

This video starts out with my Codename One project already opened in IntelliJ. See this post for steps on how to generate this project.

In the video I demonstrate two different approaches for building the iOS app.

  1. Locally (0:55-2:45) – Requires a Mac with Xcode Installed.
  2. Using Build Server (6:45-8:35) – Can be built on Windows, Linux, or Mac. With no special requirements beyond Maven and the JDK. You just need a free Codename One account.

NOTE: I also show how to generate your iOS certificates and provisioning profiles using the Certificate Wizard (2:45-6:45), as this is required to build apps for iOS.

Building Locally

The local build option generates an Xcode project, which we then open and build using Xcode.

To trigger this build, select “Local Builds” > “Xcode iOS Project”:

Screen Shot 2021-04-06 at 5.51.41 AM

Then press the “Run” button.

It takes the ParparVM compiler a minute or two to do its thing, but when it’s done, it opens the generated Xcode project in Xcode.

Screen Shot 2021-04-06 at 5.55.03 AM

Once opened, I press the “Run” button on the Xcode toolbar and wait while it compiles the project. When it is done, it opens the iOS simulator with my app running in it.

Screen Shot 2021-04-06 at 5.58.05 AM

Building with the Build Server

One of the nice things about Codename One is that it provides a build server with all of the native build tools installed and up-to-date. This simplifies the process of building native apps greatly. You can build your project for iOS, Android, Mac Desktop, Windows Desktop, Windows UWP, and Javascript without requiring any special build tools installed beyond the JDK. Building for any of these targets is as simple as pressing a button, or running a Maven goal.

Generating Certificates

Building for iOS requires that you have an Apple developer account. Additionally, Apple requires you to generate certificates and provisioning profiles for your apps. This is by far the most painful part of app development. To help ease the pain, Codename One provides a certificate wizard to help generate these. Before I can submit my first iOS build, I need to walk through the certificate wizard to generate these certificates. The certificate wizard process starts at approx 2:45 in the video, and runs until 6:45.

To access the certificate wizard, I need to open Codename One Settings. I do this by selecting “Tools” > “Codename One Settings” from IntelliJ’s configuration menu, then pressing the “Run” button.

Screen Shot 2021-04-06 at 6.11.27 AM

This will open The Control Center (aka Codename One Settings, aka Codename One Preferences):

Screen Shot 2021-04-06 at 6.12.53 AM

Once there, I select “Device Settings” > “iOS” > “Certificate Wizard” from the navigation menu on the left.

Screen Shot 2021-04-06 at 6.13.55 AM

This displays the login form for the certificate wizard:

Screen Shot 2021-04-06 at 6.15.40 AM

IMPORTANT: You need to use your Apple Developer account to login to this form. NOT your Codename One account.

In the video I spliced out some of the waiting time. The login can take a little while, so be patient. Once logged in, it shows me a list of my registered development devices, and I can select which ones I want to be able to deploy this app to for testing and debugging.

Screen Shot 2021-04-06 at 6.17.06 AM

The above screenshot has all of the rows greyed out. When you log in, you’ll see device names and UDIDs listed on this form.

Generally I select all of them. If this is your first time building an iOS app, then you may not have any devices listed yet, and you’ll need to click on the “Manage Devices” button and follow the instructions there.

Next, it asks me to confirm that I want to regenerate my certificates, as it has detected that I already have certificates generated in my Apple account. In my case, I say “yes”, I’d like to regenerate them, but in most cases, you would select “no”, to just use your existing certificates.

TIP: If your certificates were generated by the certificate wizard, then a copy of them has been stored inside the $HOME/.codenameone/iosCerts directory, and the wizard will use them automatically. If they weren’t generated by the certificate wizard, and you choose not to regenerate them, then you may need to specify the location of your certificates in the iOS Settings section.

Screen Shot 2021-04-06 at 6.25.52 AM

Next, it asks whether we want to generate push certificates. In this case, since this is just a basic Hello World app, we don’t need push, so I leave these options OFF.

Screen Shot 2021-04-06 at 6.27.38 AM

After clicking next, it will churn for a bit, and if all goes well, it will show us the message that our certificates were generated and installed successfully.

Just to be sure that my settings are saved. I click on the hamburger menu in the upper right, and select “Save”.

Screen Shot 2021-04-06 at 6.29.40 AM

Sending the Build

Now that the certificates are generated, we can send the build. Back in IntelliJ, I select “Build Server” > “iOS Debug Build”

Screen Shot 2021-04-06 at 6.32.38 AM

NOTE: If this is your first time building with the build server, you may be prompted for your Codename One username and password.

I then follow the progress of the build on the Codename One website.

When it’s finished, I get a set of links to do things like download the .ipa, or install the app on device.

Screen Shot 2021-04-06 at 6.34.32 AM

Get Started

Getting started with your own native app is really easy. Just go to the Codename One initializr, enter your app details, and press “Download”.

For more information about Codename One, see the Codename One website.

domenico-loia-1000x667

Deploying Apps on Multiple Form-Factors

Photo by Domenico Loia on Unsplash

The other day I stumbled across this post whose title seemed to suggest that Flutter is not a cross-platform framework.

Screen Shot 2021-04-06 at 10.08.33 AM

The thrust of his article is that, even though Flutter allows you to build your app for 6 platforms, that doesn’t mean that you should:

Yes, you can deploy your app on 6 platforms, but honestly, I am not planning to do so. Basically, because YOU SHOULD use different design patterns depending on the platform. I can’t imagine deploying my apps on a different platform.

At first glance, he appears to be arguing for writing separate apps for each platform (e.g. Android, iOS, Mac, Windows, etc…). This idea that you need to write a separate app for each platform using the platform’s native UI toolkit is widespread in the developer community. “Native Widget Maximalists”, as I call them, believe that using cross-platform UI libraries will result in a sub-par, “non-native” experience, and will, therefore, be rejected by the user. Generally, adherents to this philosophy are fine with sharing “business logic”, but the user interface must use the native UI widgets. Much of this dogma is based on dated observations of clunky, cross-platform, desktop apps of the mid to late nineties – many of them developed by novices using early incarnations of Swing.

Since that time, cross-platform toolkits have matured, and platforms have converged on some common UI design patterns. This is especially the case on mobile, where many popular native apps look nearly identical on Android and iOS. Mobile developers have realized that it is more important to create a nice, consistent design than it is to try to “look native”. Yes, there are differences between iOS and Android, but the differences are the exception – not the rule. In my opinion it is overkill to maintain two separate codebases for the 2% of the UI where they diverge. Better to provide abstractions that allow that 2% delta to be satisfied in platform-specific ways.

If you read further into the article, you’ll see that the author actually isn’t a “native widget maximalist”. I.e. He isn’t arguing that you should build separate apps for iOS and Android using their native SDKs. He isn’t even arguing that you need to write separate apps for iOS and Android.

Usually what works on mobile won’t work on desktop and the other way around.

What he’s saying is that you shouldn’t deploy the same app on desktop as you do on mobile, because the form factor is too different. If this is his thesis, then I agree with him… with some caveats.

Strategies for targeting multiple form factors

Disclaimer: I work for Codename One.

Two of the best cross-platform development tools for mobile development are Codename One and Flutter. They approach the problem of cross-platform development in very similar ways. Both provide 100% code reuse across platforms. Both provide a rich set of UI components and API abstractions for the underlying device capabilities, and both can be deployed to iOS and Android (and other platforms), as native apps. Codename One apps are developed in Java and/or Kotlin. Flutter, in Dart.

Both Codename One and Flutter also allow you to deploy your app as a desktop app. However, if you don’t tweak your UI for the larger screen-size, and desktop usage patterns, the result probably won’t be very good. Even using mobile apps on tablet feels forced if you haven’t customized the UI for the larger screen-size. There are four strategies I use when building a multi-form-factor app (i.e. an app that runs on mobile and desktop):

1. Responsive UI

Screen Shot 2021-04-06 at 10.26.54 AM

This is where the app logic is essentially the same across both form-factors, but the layout manager, and styles are “form-factor”-aware. E.g. On tablet/desktop they use different styles, and the layout managers position elements differently. (E.g. Instead of a hamburger button that reveals a side-menu sliding out over top of the form, the side menu is always visible).

2. Component-level abstraction

Screen Shot 2021-04-06 at 10.47.10 AM

This is where most of the app’s control flow is the same, but certain parts of each form are abstracted to allow for different implementations on desktop, tablet and mobile. This may involve using a different widget for editing some field, displaying some extra sections on desktop that aren’t visible on mobile. This is very similar to Responsive UI, and there is certainly overlap. The distinction is that with Responsive UI, you are keeping all of the same UI elements – you’re just rendering them differently. With component-level abstraction, the UI form may actually include different UI components with different logic on desktop than it does on mobile.

3. Alternate views

Screen Shot 2021-04-06 at 10.57.34 AM

This is where the app’s control flow is the same, but you create entirely different views on mobile than on tablet. If you are very careful with the design of your views, you may be able to reuse your controller classes, as long as the views share common APIs, and fire compatible events. Keeping them in sync can be challenging, so quite often you would also write separate controllers as well.

4. Separate control-flow

Screen Shot 2021-04-06 at 10.58.55 AM

This is where you are basically implementing two separate apps. You can reuse business logic, but the UI layer is written separately for tablet/desktop and mobile.

5. Separate apps

Screen Shot 2021-04-06 at 11.01.43 AM

If you are already implementing your app with separate control flow, then creating separate apps is just one small additional step. Generally you would still share all of your business logic between the apps. You would just provide alternate entry points for the different apps. With Codename One, this can be achieved either by moving all of the code into a shared library (cn1lib), or by simply providing an alternate configuration file (codenameone_settings.properties) that specifies a different main class. Most build targets use Proguard, or equivalent, to strip out unused code, so the app size isn’t impacted by the code-sharing.

Best choice?

It appears that the author of the article is arguing for option #5 – Separate apps. His preference, he says, is informed by his experience working on large enterprise systems where there would be different teams working on the apps for different platforms, and keeping it all in the same app would lead to toes being stepped on. Option #4 (Separate flow control) should adequately address his concern as well, since each form-factor would have its own package, likely, and developers wouldn’t need to tread on anyone else’s garden.

My preference is to use the lowest number on that scale that I can get away with, and progress up the ladder as required. IntelliJ makes refactoring from one strategy to another mostly painless, and the less fragmentation there is in the code-base, the easier it will be to maintain – generally. Obviously adding team members, or splitting the project into multiple teams changes that maintenance calculation.

Still prefer a cross-platform development tool

Suppose your team decides to implement separate apps for each form-factor (Mobile, Tablet, and Desktop). Let’s even go a step further and suppose that you decide to implement separate apps for each platform (Android Mobile, Android Tablet, iPhone, iPad, Mac, Windows, Linux). Then is there still any benefit using a cross-platform toolkit like Codename One or Flutter? Since you’re doing separate apps, wouldn’t it be just as well to just use the native APIs?

Unless you have an unlimited supply of time, developers, and money, then the answer is “no”. You would be much worse off by choosing to use separate native SDKs for each platform. Even if you manage to write some shared modules that you were able to share between the projects, the complexity involved in maintaining separate codebases is staggering. Everything is 7x more difficult. Every bug is fixed 7 times, and testing gets ridiculously complex. In addition, keeping up with the latest on all of these platforms and APIs takes dedication. You would likely need to bring in separate teams for each platform – and very little of the work can be shared between the teams.

Using a technology like Flutter – even if you are building 7 separate apps, would be far easier. Sharing code between projects is much easier, and every developer can work on every project without facing barriers to entry imposed by the idiosyncrasies of each native API.

Summary

Just because you can deploy your app to 8 different platforms, doesn’t mean that you should. Deploying to multiple platforms within the same form factor (e.g. phones) is a solid approach with a proven track record – with countless popular apps on the iOS and Android app stores currently developed with cross-platform tools like Codename One and Flutter. However, deploying to multiple form-factors (e.g. phone and desktop) is more difficult, as what works on one form-factor, may not work well on another. You may be better served by creating separate projects for each form factor, and sharing business logic between them. This doesn’t mean that you should drop your cross-platform development tool (e.g. Flutter/Codename One). Using such a tool is still a benefit as it reduces the combined project complexity, and makes it easier to share code and developers between the projects.

Maven2Android

Codename One Project -> Build Android App

In my last post I showed off the new Codename One initializr online tool, generating a Maven project, and opened it in IntelliJ.

In this video I demonstrate how to build an Android app with this project.

TLDW (Too Long Didn’t Watch):

Here’s the gist of the video. There are two different build options for Android:

  1. Build Server > Android
  2. Local Builds > Android Gradle Project

In this video, I start with option 2, “Android Gradle Project”. This option does NOT require a Codename One account, and performs all of the build on your local machine. It does require that you have Android Studio installed.

I select “Local Builds” > “Android Gradle Project” from the Configuration menu of IntelliJ, and then press “Run”.

Screen Shot 2021-03-30 at 9.25.41 AM

This generates an Android Studio project, and automatically opens it in Android studio.

Screen Shot 2021-03-30 at 9.27.42 AM

I then press “Run” in the Android Studio, and wait while it builds and installs the app on my Android Emulator.

Screen Shot 2021-03-30 at 9.29.25 AM

In the second part of this video, I use the “Build Server” > “Android” build option, which is much simpler, and doesn’t require you to install Android Studio. All you need is IntelliJ (Actually you don’t even need IntelliJ, as you could just build the project using Maven), and it will use the Codename One build server to generate the Android app.

After selecting “Build Server” > “Android” from the configuration menu, I press “Run” to start the build.

Screen Shot 2021-03-30 at 9.30.39 AM

It then redirects me to the Codename One dashboard where I can monitor the build progress and, download the app when it’s done.

Screen Shot 2021-03-30 at 9.31.37 AM

More Background

When we decided to migrate to Maven, we also made the choice to add official local build targets so that developers are no longer reliant on the build server to build their Android and iOS apps. Building locally has always been an option, but it was difficult, and we didn’t provide support for it. By adding an official local build option, we are hoping that developers who balked at Codename One because they didn’t want to be reliant on us for their builds will give us another look.

If you haven’t heard of Codename One yet, I encourage you to check us out. In my biased opinion, we are the best game in town, if you’re looking to build native mobile apps in Java or Kotlin.

It only takes a minute to create and build your first project using Codename One initializr.

Ramblings about Xataface, Java, and other software development issues